Rocking chairs offer unparalleled comfort and relaxation‚ making them a timeless addition to any home. Their soothing motion promotes stress relief and creates a cozy atmosphere‚ perfect for unwinding.
1.1 Importance of Rocking Chairs in Home Decor
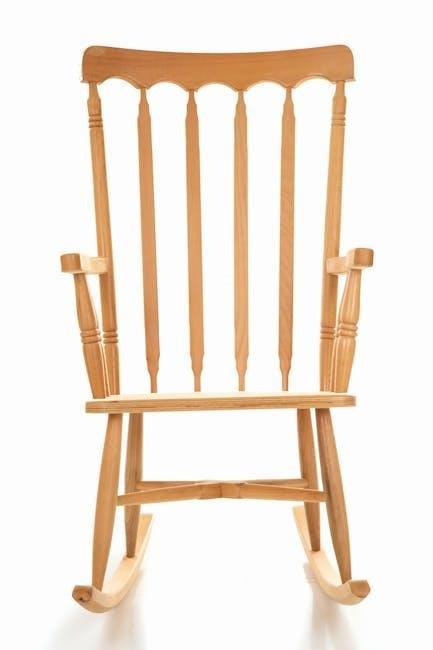
Rocking chairs add timeless charm and versatility to home decor‚ blending seamlessly with both classic and modern interiors. Their gentle motion creates a soothing ambiance‚ making them a focal point in living rooms or porches. Available in various styles‚ from mission to Adirondack designs‚ they complement diverse aesthetics while offering comfort and elegance. These chairs enhance form and function‚ making them a beloved addition to any space.
1.2 Health Benefits of Using Rocking Chairs
Rocking chairs provide numerous health benefits‚ including stress relief and improved relaxation. The gentle motion can soothe muscles‚ reduce anxiety‚ and promote better sleep. They are particularly beneficial for older adults‚ as the rhythmic movement can help with mobility and joint pain. The ergonomic design of many rocking chairs also supports proper posture‚ making them an excellent choice for individuals with back pain or those seeking comfort during recovery.
Materials and Tools Required for Building a Rocking Chair
Building a rocking chair requires durable wood like oak or pine‚ screws‚ nails‚ and sandpaper. Essential tools include a drill‚ saw‚ and screwdriver for precise construction.
2.1 List of Lumber and Hardware Needed
To build a rocking chair‚ you’ll need lumber such as oak‚ pine‚ or maple for durability. Hardware includes wood screws‚ nails‚ bolts‚ and wood glue. Plan for 2×2 or 1×4 boards for the frame and slats. Additional materials include sandpaper‚ varnish‚ and paint for finishing. Ensure you have enough screws (1-2 inches) and bolts for secure joints. Optional items like cushions or upholstery can enhance comfort and aesthetics.
2.2 Essential Tools for the Project
To build a rocking chair‚ essential tools include a table saw‚ drill press‚ jigsaw‚ and sanders for precise cuts and smooth finishes. Hand tools like chisels‚ hammers‚ and screwdrivers are also crucial. Clamps and workbenches help in assembling parts securely. Safety gear like gloves and goggles is a must. Additionally‚ a tape measure and pencil are needed for accurate measurements and markings. Ensure all tools are in good condition to avoid delays and ensure quality craftsmanship.
Finding Free Rocking Chair Plans in PDF Format
Discover free PDF plans for rocking chairs online through top woodworking websites and platforms. These plans often include detailed instructions‚ measurements‚ and diagrams for easy construction.
3.1 Top Websites Offering Free Plans
Several websites offer free PDF plans for rocking chairs‚ perfect for DIY enthusiasts. WoodArchivist.com provides detailed furniture plans‚ while Construct101 offers a free Adirondack rocking chair plan. Studio C’s plan is moderately challenging without needing advanced tools. Etsy and Pinterest also feature unique designs‚ though some may require templates. These resources cater to various skill levels‚ ensuring you find a plan that suits your project needs and preferences.
3.2 How to Download and Use the Plans
To download free PDF plans‚ visit websites like WoodArchivist.com or Construct101. Locate the rocking chair plan‚ click the download link‚ and save the PDF. Print the plans for easy reference. Review the materials list and instructions carefully. Follow the step-by-step guide to cut and assemble the wood. Use the plans as a blueprint to ensure accuracy; Many sites also offer video tutorials for additional guidance‚ making the process smoother for beginners.

Popular Styles and Designs of Rocking Chairs
Rocking chairs come in various styles‚ from classic Mission and Adirondack designs to modern‚ sleek options; Many free PDF plans feature these popular designs‚ ensuring versatility.
4.1 Classic and Modern Designs
Classic rocking chairs‚ like the Mission and Adirondack styles‚ feature timeless craftsmanship with sturdy wood frames and comfortable seating. Modern designs offer sleek lines‚ minimalistic aesthetics‚ and innovative materials‚ blending functionality with contemporary decor. Free PDF plans often include both styles‚ allowing builders to choose designs that suit their home’s ambiance and personal preferences. These designs cater to various skill levels‚ ensuring everyone can create a beautiful rocking chair.
4.2 Folding and Space-Saving Options
Folding rocking chairs are ideal for small spaces‚ offering portability and convenience. These designs allow easy storage and transportation‚ perfect for patios‚ balconies‚ or camping trips. Space-saving plans often feature collapsible frames or compact dimensions‚ making them suitable for urban living. Many free PDF plans include instructions for lightweight‚ durable materials‚ ensuring functionality without sacrificing comfort. These chairs are practical for those needing versatility in their furniture choices.
Step-by-Step Guide to Building a Rocking Chair
This guide provides a detailed‚ easy-to-follow process for constructing a rocking chair‚ from preparing wood to assembling the frame and attaching rockers for a sturdy finish.
5.1 Preparing the Wood and Cutting Pieces
Start by selecting high-quality lumber‚ ensuring it is dry and free of knots. Sand all wood surfaces to smooth them out before cutting. Use precise measurements to cut each piece according to your plan‚ employing tools like a miter saw or circular saw for accuracy. Safety is key—wear protective gear‚ including gloves and a dust mask. After cutting‚ label each piece for easy identification during assembly. Organize your workspace to keep components accessible and ready for the next step. Proper preparation ensures a seamless assembly process.
5.2 Assembling the Frame and Seat
Begin by assembling the frame using clamps to hold parts in place. Drill pilot holes and secure joints with screws or wood glue for stability. Sand all edges to ensure smooth surfaces. Attach the seat frame to the base‚ aligning carefully for a snug fit. Use wood glue and clamps to reinforce connections. Once dry‚ test the sturdiness of the frame and seat. Ensure all joints are tight and balanced before proceeding to the next step.
5.3 Attaching the Rockers and Final Touches
Align the rockers with the chair frame‚ ensuring proper balance. Secure them using screws or bolts. Sand the entire chair to smooth out rough edges and splinters. Apply a finish‚ such as stain or paint‚ and let it dry completely. Add a protective coat of polyurethane for durability. Finally‚ test the chair to ensure smooth rocking motion and stability. Your rocking chair is now ready for use!

Tips and Tricks for Beginners
Measure carefully‚ use clamps to hold pieces steady‚ and sand thoroughly. Work in a well-lit area and follow safety guidelines. Practice on scrap wood before cutting final pieces. Use proper tools to avoid mistakes and ensure a smooth finish. Start with simpler designs and gradually move to complex patterns.
6.1 Common Mistakes to Avoid
Common mistakes include improper measurements‚ rushing through cuts‚ and ignoring plan details. Ensure all pieces fit before assembly and avoid skipping sanding steps. Over-tightening screws can cause wood to split‚ while uneven rockers may lead to instability. Take breaks to maintain focus and use templates for consistent cuts. Double-check hardware placement and avoid deviating from the plan without adjustments. Proper preparation prevents costly errors and ensures a sturdy‚ balanced chair.
6.2 Time-Saving Hints for First-Time Builders
Pre-cut lumber and prepare materials in advance to save time. Use templates for consistent cuts and reduce measuring errors. Work in a well-organized workspace to avoid tool searches. Follow plans step-by-step to maintain focus and avoid rework. Consider pre-drilling holes and using clamps to ensure alignment. Sanding between steps prevents last-minute touch-ups. Batch similar tasks‚ like cutting slats or assembling frames‚ for efficiency. Time-saving hints help first-time builders complete projects smoothly and enjoy the process.

Customization and Personalization Ideas
Personalize your rocking chair with unique finishes‚ colors‚ or engravings. Choose materials like red oak or white oak for a customized look that matches your style.
7.1 Adding Unique Finishes and Colors
Enhance your rocking chair with distinctive finishes and hues. Stains like mission or quartered oak add elegance‚ while vibrant paints can create a modern‚ eye-catching piece. Consider distressing for a vintage look or applying a clear coat for a natural finish. These options allow you to customize the chair to fit your home decor perfectly.
7.2 Incorporating Personalized Designs
Personalized designs can make your rocking chair truly unique. Consider adding engravings‚ carved patterns‚ or custom shapes to reflect your personal style. You can also incorporate meaningful symbols or names for a special touch. Additionally‚ experimenting with unique upholstery fabrics or cushions can further enhance the chair’s individuality‚ making it a one-of-a-kind piece that stands out in any setting.

Safety Precautions and Best Practices
Always wear protective gear like goggles and gloves when working with power tools. Ensure proper ventilation to avoid inhaling dust. Keep loose clothing tied back and avoid distractions while cutting or drilling. Regularly inspect tools for damage and follow manufacturer instructions. Maintain a clean workspace to prevent tripping hazards. Keep children and pets away during construction. Double-check all joints and connections before final use to ensure stability and safety.
8.1 Workshop Safety Tips
Ensure proper ventilation in your workspace to avoid inhaling dust. Wear safety goggles and gloves when using power tools. Keep loose clothing and long hair tied back to prevent accidents. Avoid wearing jewelry that could get caught in machinery. Maintain a clean and organized workspace to reduce tripping hazards. Keep children and pets away while working. Regularly inspect tools for damage and ensure they are in good working condition. Always follow the manufacturer’s instructions for equipment use.
8.2 Proper Use of Power Tools
Always read and follow the manufacturer’s instructions for power tools. Use the correct tool for the task to ensure safety and accuracy. Keep workpieces securely clamped to prevent movement. Avoid wearing loose clothing or jewelry that could get caught. Maintain tools regularly to ensure they function properly. Wear ear protection when using loud equipment. Keep children away and store tools in a dry‚ secure location after use.
Time and Cost Estimates
Building a rocking chair typically takes 15–30 hours‚ depending on skill level. Costs range from $50–$200‚ depending on materials. Budget-friendly options are available.
9.1 Estimated Completion Time
Building a rocking chair typically takes 15–30 hours‚ depending on skill level. Experienced craftsmen may finish in 15 hours‚ while beginners might need 25–30 hours. Simple designs take less time‚ while intricate details increase the duration. Proper planning and having all materials ready can significantly speed up the process. Factors like design complexity and tool availability also influence the timeline.
9.2 Budget-Friendly Options for Materials
Using affordable materials like plywood or reclaimed wood can significantly reduce costs. Plain sawed red oak or quartered white oak are economical choices for a classic look. Minimizing waste by carefully planning cuts ensures materials are used efficiently. Shopping for hardware during sales or using readily available lumber can also lower expenses. Budget-friendly options allow you to build a high-quality rocking chair without overspending.
Building a rocking chair using free PDF plans is a rewarding project that offers both relaxation and a sense of accomplishment. It’s a cost-effective way to create a personalized piece of furniture that will provide years of comfort and enjoyment for you and your family.
10.1 Summarizing the Benefits of Building Your Own Rocking Chair
Building your own rocking chair offers numerous benefits‚ including cost savings‚ customization‚ and a sense of accomplishment. It allows you to choose materials and designs that suit your style and needs‚ ensuring a perfect fit for your home. The process also fosters creativity and skill development‚ making it a rewarding DIY project. Additionally‚ handmade chairs often hold sentimental value and can become cherished family heirlooms for years to come.
10.2 Encouragement to Start Your Project
Embark on your rocking chair project with confidence! With free PDF plans readily available‚ you can easily kickstart your journey. Building your own chair is a fulfilling experience that allows you to create something meaningful and tailored to your taste. Don’t hesitate—gather your tools‚ follow the guide‚ and enjoy the pride of crafting a piece that will bring comfort and joy for years to come. Start today and make your vision a reality!
Leave a Reply