Singer Sewing Machine Manuals for Old Machines: A Comprehensive Guide
Delve into the world of vintage Singer sewing machines! This guide offers essential resources for locating, understanding, and maintaining these iconic machines, ensuring their longevity.
Understanding the Importance of Manuals
Singer sewing machine manuals are indispensable for owners of vintage models. They provide crucial insights into the specific operation, maintenance, and troubleshooting of each machine, often unavailable elsewhere. These guides detail threading procedures, stitch adjustments, and part identification – knowledge vital for preserving functionality.
Without a manual, understanding the nuances of a classic Singer can be challenging. Manuals unlock access to advanced techniques, like decorative stitching or darning, originally intended by the manufacturer. They also offer safety precautions, preventing damage to both the machine and the user.
Essentially, a manual isn’t just instructions; it’s a connection to the machine’s history and a pathway to continued successful use.
Why Old Machine Manuals are Valuable
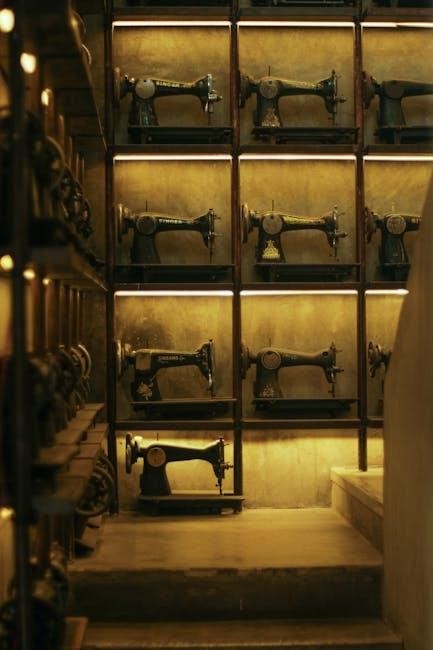
Old Singer manuals represent more than just operating instructions; they are historical documents. They offer a glimpse into the manufacturing practices and design philosophies of a bygone era, showcasing the ingenuity of early sewing technology. These manuals often contain detailed illustrations and explanations tailored to the specific model, something modern generalized guides lack.
Furthermore, vintage machines frequently utilize unique parts and mechanisms. The manual is the primary source for identifying these components and understanding their proper function. Preserving these manuals ensures the continued repairability and usability of these machines, preventing them from becoming obsolete.
They empower owners to become self-sufficient in maintaining their heirloom machines, fostering a deeper appreciation for their craftsmanship.
Locating Manuals: Online Resources
Fortunately, numerous online resources offer access to Singer sewing machine manuals. The Internet Archive is a treasure trove, hosting digitized versions of many original manuals, freely available for download. Singer’s official website also features a historical documents section, though coverage may be limited to specific eras.
Several dedicated sewing machine manual websites curate collections from various manufacturers, including Singer. These sites often allow searching by model number or year of production. Be aware that some sites may require registration or offer manuals for a fee; Thoroughly vet any website before providing personal information.
Remember to utilize search terms like “Singer [model number] manual” to refine your search results.
Internet Archive
The Internet Archive stands as a premier destination for sourcing vintage Singer sewing machine manuals. This non-profit organization diligently preserves and provides universal access to digitized materials, including a substantial collection of historical manuals. Users can freely browse and download manuals in various formats, often including PDF, making them easily accessible.
Navigating the Internet Archive requires utilizing specific search terms, such as “Singer sewing machine manual” combined with the model number. The platform’s interface allows filtering by publication date and language.
Remember the Internet Archive relies on user contributions; therefore, manual availability varies. It’s a fantastic resource, but patience and persistence are key!
Singer’s Official Website (Historical Documents)
Singer’s official website harbors a valuable, though sometimes limited, archive of historical documents, including select sewing machine manuals. While not as comprehensive as the Internet Archive, it offers authentic resources directly from the manufacturer, ensuring accuracy.
Locating these documents often requires navigating through the “Support” or “History” sections of the website. Search functionality can be utilized, but specific model numbers are crucial for effective results. Expect to find manuals for popular and significant models, particularly those from the earlier eras of Singer’s production.
Be aware that the availability of manuals fluctuates as Singer updates its website. It’s a worthwhile starting point for verifying information found elsewhere.
Dedicated Sewing Machine Manual Websites
Numerous websites specialize in hosting sewing machine manuals, offering a concentrated resource for Singer enthusiasts. These platforms often compile manuals from various sources, creating extensive libraries searchable by brand, model number, and even serial number.
Examples include sites dedicated to vintage sewing machines and those offering repair services, as they frequently archive manuals for diagnostic and restoration purposes. While generally reliable, verifying the authenticity and completeness of downloaded manuals is always recommended.
These websites often feature user forums where owners share manuals and offer assistance with identification and troubleshooting. They represent a collaborative effort to preserve knowledge about these classic machines.
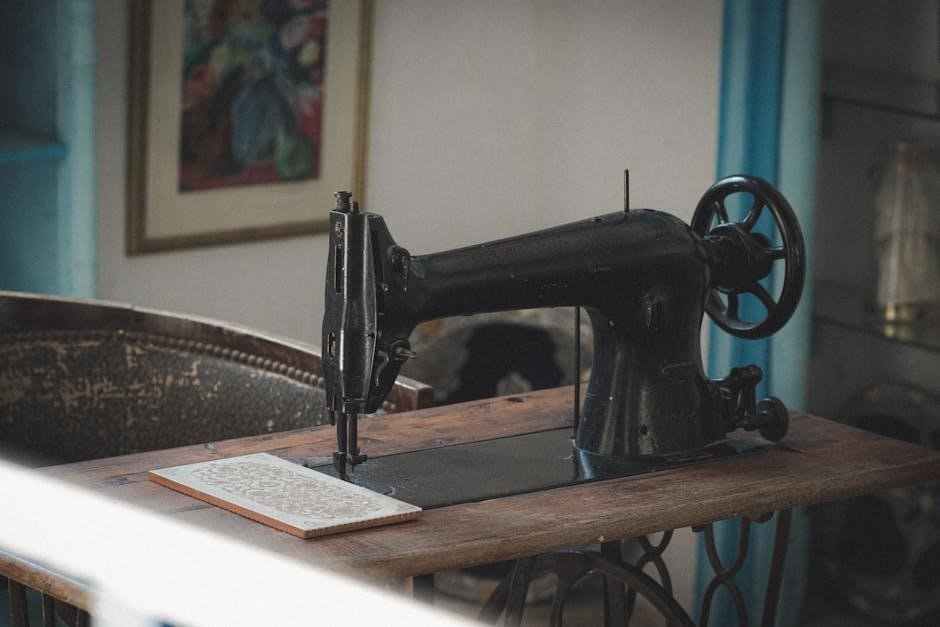
Identifying Your Machine: Key Information
Accurate identification is crucial for finding the correct manual for your vintage Singer. Begin by locating the model number, typically found on a plate affixed to the machine – often on the front, back, or underside. The serial number, also on the plate, is vital for dating your machine and pinpointing specific manufacturing details.
Record both numbers precisely, noting any alphanumeric characters. These identifiers unlock access to Singer’s historical records and specialized online databases. Understanding the location of these numbers prevents frustrating searches and ensures you obtain the appropriate documentation for your specific Singer model.
Correct identification streamlines troubleshooting and maintenance procedures.
Model Number Location
Pinpointing your Singer’s model number is the first step to accessing relevant manuals. While locations vary, common spots include a metal plate on the front of the machine, often near the handwheel. Check the underside, particularly towards the back, or even inside the access doors for bobbin winding or maintenance.
For some older models, the plate might be subtly placed. Examine carefully! The number is usually a combination of letters and numbers (e.g., 15-91, 201-2). Note it exactly as it appears, including dashes. Accurate recording is essential for successful manual searches.
If no plate is visible, consult online Singer resources or forums for guidance specific to your machine’s style.
Serial Number Significance
The serial number, often found alongside the model number, is crucial for dating your Singer machine and sometimes identifying specific variations. It’s a unique identifier assigned during manufacturing. While not always directly linked to manual versions, it helps pinpoint the year of production.
Singer serial number databases exist online, allowing you to estimate the machine’s age. This information can be valuable when seeking accurate manuals, as designs and features evolved over time. Knowing the production year can clarify which manual best matches your machine’s specifications.
Record the serial number carefully; it’s a long string of numbers and can be easily misread.
Dating Your Singer Machine
Accurately dating your Singer machine is vital for finding the correct manual. While the model number narrows it down, the serial number provides a more precise timeframe. Numerous online resources, including dedicated Singer websites and forums, host serial number databases.
These databases correlate serial number ranges with specific production years. Inputting your machine’s serial number will yield an estimated manufacturing date. Remember, these are estimations, as production runs sometimes overlap. Knowing the approximate age helps identify the manual reflecting your machine’s features.
Consider the machine’s style and features alongside the serial number date for confirmation.
Decoding the Manual: Common Sections
Vintage Singer manuals typically include safety precautions, parts lists, threading guides, and operational instructions. Understanding these sections unlocks your machine’s full potential.
Safety Precautions
Prioritizing safety is paramount when operating vintage Singer sewing machines. Manuals consistently emphasize keeping fingers away from moving parts, like the needle and foot presser, to prevent injury. Always disconnect the machine from the power source before performing any maintenance, such as changing the needle or oiling.
Be cautious of electrical components in older models, ensuring proper grounding and avoiding use with damaged cords. Never force the machine beyond its capabilities; attempting to sew excessively thick materials can strain the motor and potentially cause breakage.
Proper lighting is crucial for clear visibility, reducing eye strain and improving accuracy. Finally, always supervise children when they are near a sewing machine, and store the machine in a safe, dry location when not in use.
Machine Parts Identification
Singer manuals meticulously detail each component. Key areas include the needle system – understanding different needle types for various fabrics is crucial. The bobbin system, whether oscillating or rotary, requires specific threading techniques outlined in the manual. Tension control mechanisms, both upper and lower, are vital for stitch quality; manuals illustrate adjustments.
A comprehensive foot and attachment guide showcases the diverse range of presser feet available – zigzag, buttonhole, and more – and their specific applications. Diagrams clearly label the handwheel, feed dogs, presser bar, and throat plate.
Understanding the function of the motor, belt (if applicable), and fly wheel is also essential for maintenance and troubleshooting. Manuals often include exploded views for easier part identification.
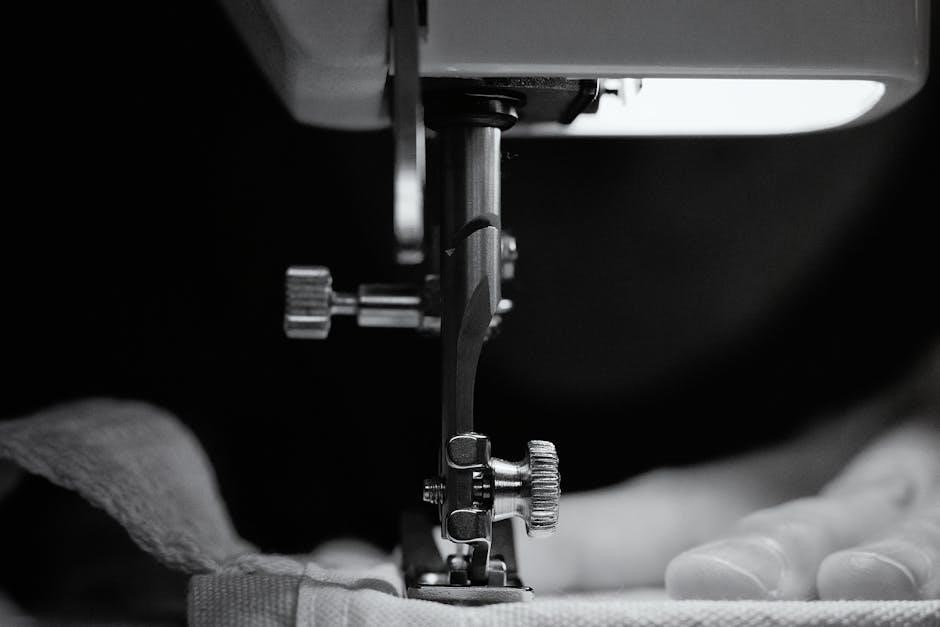
Needle and Bobbin Systems
Singer manuals dedicate significant detail to these core components. Older machines utilized various needle systems – understanding your machine’s specific requirement (e.g., system 15, system 20) is paramount for correct needle selection. Manuals illustrate proper needle insertion and the importance of a correctly sized needle for the fabric weight.
Bobbin systems differed; some used oscillating shuttles, others rotary. Manuals provide step-by-step diagrams for winding the bobbin correctly and inserting it into the machine. Proper bobbin tension is critical, and manuals detail adjustment methods.
Troubleshooting sections address issues like needle breakage or skipped stitches often linked to incorrect needle/bobbin setup.
Tension Control Mechanisms
Singer manuals meticulously explain tension control, vital for balanced stitches. Vintage machines feature both upper and lower tension adjustments, often utilizing dials or screws. Manuals illustrate how to recognize tension problems – loops on the top or bottom of the fabric indicate imbalances.
They detail the process of adjusting the upper tension dial, emphasizing small increments and test sewing. Lower tension adjustments, often involving the bobbin case, are also covered. Understanding the interplay between upper and lower tension is key.
Manuals often include charts correlating fabric type to recommended tension settings, aiding in achieving optimal stitch quality.
Foot and Attachment Guide
Singer manuals dedicate significant space to available feet and attachments, expanding machine capabilities. These guides showcase various presser feet – zigzag, buttonhole, hemmer, and more – detailing their specific functions and appropriate applications. Illustrations demonstrate proper attachment methods, crucial for correct operation.
Beyond feet, manuals list available accessories like edge stitchers, rufflers, and embroidery hoops. They explain how these attachments enhance creative possibilities, offering instructions for their use. Diagrams clarify attachment positioning and adjustments.
Older manuals often emphasize the importance of using genuine Singer attachments for optimal performance and to avoid damaging the machine.
Basic Operation Instructions
Singer manuals meticulously detail fundamental operations, guiding users through each step. They begin with clear instructions on threading the machine, illustrating the correct path for the thread from spool to needle, emphasizing tension adjustments. Bobbin winding is explained with diagrams, ensuring proper filling and insertion.
Stitch selection receives comprehensive coverage, outlining different stitch types and their intended uses. Manuals demonstrate stitch length and width adjustments, allowing for customization. Detailed explanations cover reverse stitching and the operation of various machine controls.
Early manuals often included practice exercises to build user confidence and skill.
Threading the Machine
Singer manuals prioritize clear threading diagrams, crucial for proper machine function. Instructions begin with spool placement, specifying correct spool type and direction. The thread path is meticulously illustrated, guiding the user through each guide and tension disc. Emphasis is placed on ensuring the thread is securely seated in each component.
Manuals detail how to raise the presser foot before threading, releasing tension for easier passage. Precise instructions cover threading the needle, often recommending a specific needle size for different fabrics. Diagrams show correct needle insertion and thread direction.
Troubleshooting tips address common threading errors, like missed guides or tangled thread.
Winding the Bobbin
Singer manuals dedicate significant detail to bobbin winding, a foundational skill. Instructions begin by placing the spool on the spool pin, specifying correct thread direction and securing methods. The manual illustrates guiding the thread through tension discs and onto the bobbin. Emphasis is placed on even winding for consistent stitch quality.
Diagrams clearly show how to engage the bobbin winder mechanism, often involving a lever or knob. Manuals specify winding speed and the importance of not overfilling the bobbin. Troubleshooting tips address uneven winding or thread breakage during this process.
Older manuals may detail different bobbin types and their compatibility.
Stitch Selection and Adjustment
Singer manuals meticulously explain stitch selection, a core function of these machines. They detail each stitch type – straight, zigzag, and decorative – with illustrations showing the corresponding dial or lever positions. Adjustment instructions cover stitch length and width, crucial for fabric compatibility and desired aesthetic.
Manuals emphasize the importance of test stitching on scrap fabric before beginning a project. They provide guidance on adjusting tension for different thread and fabric combinations, preventing puckering or looping; Diagrams illustrate how to modify settings for specific stitch effects.
Older models may have limited stitch options, but manuals thoroughly cover their nuances.
Troubleshooting Common Issues
Singer manuals diagnose frequent problems like thread breakage, skipped stitches, and tension faults. They offer step-by-step solutions for restoring smooth operation.
Thread Breakage Problems
Frequent thread breakage is a common issue with vintage Singer machines, often detailed in their manuals. These guides typically advise checking the threading path meticulously, ensuring the thread isn’t snagging on any components. Incorrect threading is a primary culprit!
Manuals also emphasize the importance of using the correct needle size for the fabric and thread weight. A needle too small or too large can cause breakage. Furthermore, proper tension adjustment is crucial; too-tight tension strains the thread. Inspect the needle for burrs or damage, replacing it if necessary.
Old manuals often suggest cleaning the tension discs, as lint buildup can impede smooth thread flow. Finally, ensure the bobbin is wound evenly and correctly inserted, as an improperly wound bobbin can contribute to thread breaks.
Skipped Stitches and Loop Formation
Singer manuals address skipped stitches and loop formation as frequent concerns with older machines. They typically pinpoint needle issues as a primary cause – a bent, dull, or incorrectly inserted needle often leads to these problems. Ensure the needle is fully inserted and facing the correct direction, as detailed in the manual’s diagrams.
Tension imbalances are also highlighted; improper upper or bobbin tension can disrupt the stitch formation. Manuals instruct users to adjust tension incrementally, testing after each adjustment. The timing of the needle and hook is critical; manuals may contain instructions (or warnings against attempting adjustments) regarding this complex mechanism.
Finally, using the wrong type of needle or thread for the fabric can cause issues. Refer to the manual’s recommendations for appropriate pairings.
Tension Issues: Too Tight or Too Loose
Singer manuals consistently emphasize tension as a key factor in stitch quality. Too-tight tension results in puckering, broken thread, and difficulty pulling the fabric through; manuals advise loosening the upper tension dial incrementally. Conversely, loose tension causes looping on the underside of the fabric, indicating the need to tighten the upper tension.
Bobbin tension also requires careful adjustment. Manuals detail how to access and adjust the bobbin case tension screw, stressing small adjustments are crucial. Incorrect bobbin winding can mimic tension problems, so proper winding technique is also covered.
The manual stresses using the correct thread type and weight, as these significantly impact tension settings. Always test adjustments on scrap fabric before sewing your project.
Motor and Electrical Concerns (Vintage Machines)
Vintage Singer manuals offer limited electrical troubleshooting due to safety concerns. They primarily advise against attempting repairs yourself, recommending professional servicing for motor issues. However, manuals detail checking the power cord for damage and ensuring the machine is properly grounded.
Common issues included slow motor speed, often linked to dust accumulation or lack of lubrication within the motor housing. Manuals caution against using flammable liquids for cleaning.
Older machines may utilize brushes within the motor; manuals suggest these wear over time and require replacement by a qualified technician. Never operate a machine with exposed wiring!
Maintenance and Care
Preserve your Singer’s functionality! Regular oiling, cleaning, and belt replacement (when applicable) are crucial, as detailed in the original manuals, for smooth operation.
Oiling and Lubrication
Maintaining proper lubrication is paramount for a vintage Singer’s smooth operation and longevity. Your machine’s manual will specify precise oiling points – typically, these include the bobbin case, shuttle hook, and all moving parts within the machine head. Use a high-quality sewing machine oil, never household oil, as it can gum up over time.
Apply oil sparingly; a few drops are often sufficient. Over-oiling attracts dust and lint, creating a sticky residue. After oiling, run the machine briefly to distribute the lubricant. Regular oiling, as per the manual’s schedule, prevents wear and tear, ensuring consistent stitch quality and preventing potential mechanical failures. Remember to wipe away any excess oil to keep your machine clean and functioning optimally.
Cleaning Procedures
Regular cleaning is crucial for maintaining your vintage Singer sewing machine’s performance. Begin by disconnecting the power source. Use a soft brush to remove lint and dust from the bobbin area, feed dogs, and around the needle plate. A small vacuum cleaner with a brush attachment can also be helpful.
For stubborn grime, a slightly dampened (not wet!) cloth can be used, but avoid harsh chemicals or solvents. Clean the exterior with a soft, dry cloth. Pay attention to areas where oil may accumulate. Consistent cleaning prevents lint buildup, which can cause skipped stitches and mechanical issues. A clean machine operates more smoothly and extends the lifespan of this treasured piece of engineering.
Belt Replacement (If Applicable)
Older Singer machines often utilize a belt to connect the handwheel to the internal mechanisms. If the belt is cracked, frayed, or slipping, replacement is necessary. First, disconnect the power! Carefully remove the access panels, consulting your machine’s manual for specific instructions. Note the belt’s routing before removal – a photograph is helpful.
Obtain a replacement belt of the correct size and material. Install the new belt, ensuring it’s properly seated in the grooves of the pulleys. Reassemble the machine, verifying the belt tension is correct; it should have slight give but not be overly loose. A properly installed belt restores power transmission and smooth operation.
Preventative Maintenance Schedule
Regular maintenance extends the life of your vintage Singer. A simple schedule ensures optimal performance. After every 8 hours of use: Dust the machine, removing lint from the bobbin area and feed dogs. Monthly: Oil all designated lubrication points as indicated in your manual – avoid over-oiling! Inspect the belt for wear and tear.
Every six months: Thoroughly clean the machine, including the internal components. Check and adjust tension settings. Annually: Replace the needle and bobbin if needed. Consider a professional servicing for a deep clean and inspection. Consistent care prevents costly repairs and preserves this mechanical marvel.
Advanced Techniques (Based on Manual Content)
Unlock your Singer’s full potential! Explore embroidery, darning, and specialized presser feet techniques detailed within original manuals for creative sewing projects.
Embroidery and Decorative Stitching
Vintage Singer manuals frequently showcase a surprising range of embroidery and decorative stitching capabilities. Many older machines, beyond basic straight and zigzag stitches, offered specialized feet and plate options for creating intricate designs. Manuals detail how to adjust stitch width and length for varied effects, and often include pattern guides for floral motifs, geometric shapes, and personalized monograms.
These sections often illustrate how to utilize optional attachments like embroidery hoops and specialized presser feet to achieve professional-looking results. The manuals provide clear instructions on thread selection – recommending specific weights and types for optimal embroidery – and guidance on stabilizing fabrics to prevent puckering. Discovering these hidden features within your machine’s manual can unlock a new dimension of creative expression, transforming simple sewing into beautiful artistry.
Darning and Mending Techniques
Singer sewing machine manuals from bygone eras placed significant emphasis on the art of darning and mending – skills essential for extending the life of garments. These sections meticulously detail techniques for repairing holes in stockings, reinforcing worn elbows, and patching fabrics with near-invisible stitches. Manuals illustrate the use of specialized darning plates, which create a supportive surface for weaving new threads into damaged areas.
Detailed diagrams demonstrate how to adjust stitch settings for different fabric weights and damage types, ensuring a secure and aesthetically pleasing repair. Instructions cover various mending methods, including patching, reinforcing seams, and replacing buttons. These techniques weren’t merely about repair; they were about resourcefulness and sustainability, reflecting a culture of making do and mending, a valuable skill to rediscover today.
Using Attachments and Accessories
Vintage Singer manuals dedicate substantial sections to the myriad attachments and accessories available, transforming a basic machine into a versatile workshop. These weren’t simply add-ons; they unlocked a world of creative possibilities, from gathering and pleating to quilting and embroidery. Manuals provide detailed illustrations and instructions for installing and operating each attachment, ensuring optimal performance.
Descriptions cover specialized feet for specific fabrics, edge stitchers, rufflers, and even attachments for creating decorative effects. Understanding these accessories is key to unlocking the full potential of an older Singer. The manuals emphasize proper attachment selection based on the desired outcome and fabric type, guiding users toward professional-looking results. They truly expanded the machine’s capabilities beyond basic sewing;
Understanding Different Presser Feet
Singer sewing machine manuals meticulously detail the function of each presser foot, recognizing their crucial role in achieving diverse sewing results. Beyond the standard zigzag and straight-stitch feet, manuals illustrate specialized options like the rolled hem foot, blind hem foot, and buttonhole foot, each designed for a specific task. Detailed diagrams showcase proper foot installation and adjustment for optimal fabric feed.
Older manuals often included feet for decorative stitching, embroidery, and even quilting, expanding the machine’s creative potential. Understanding the subtle differences between feet – the shape of the sole, the position of the needle – is vital for achieving professional-quality seams and embellishments. Proper foot selection prevents fabric damage and ensures consistent stitch formation, maximizing the machine’s versatility.
Leave a Reply