
Accessing the Clock Movement and Chimes
Access the clock movement and chimes through the back of the clock. Howard Miller uses rubber bands, foam, and styrofoam to secure components during shipping. A label on the back provides contact information for assistance.
1.1. Removing Packaging Materials
Howard Miller clocks are carefully packaged with rubber bands, foam, styrofoam, and cardboard to protect components during shipping. To remove packaging materials, gently unpack the clock and discard all protective items. Handle the movement and chimes with care to avoid damage. Use a soft tool like a plastic utensil to remove stubborn packaging without scratching surfaces. Refer to the manual for specific unpacking instructions.
1.2. Locating the Movement and Chimes
The clock movement and chimes are accessible through the back of the clock. Once packaging materials are removed, the movement is visible and secured with rubber bands and foam. The chimes are typically located near the movement, protected by additional padding. Refer to the manual for specific guidance, as the exact location may vary slightly depending on the clock model. Always handle these components with care to avoid damage.
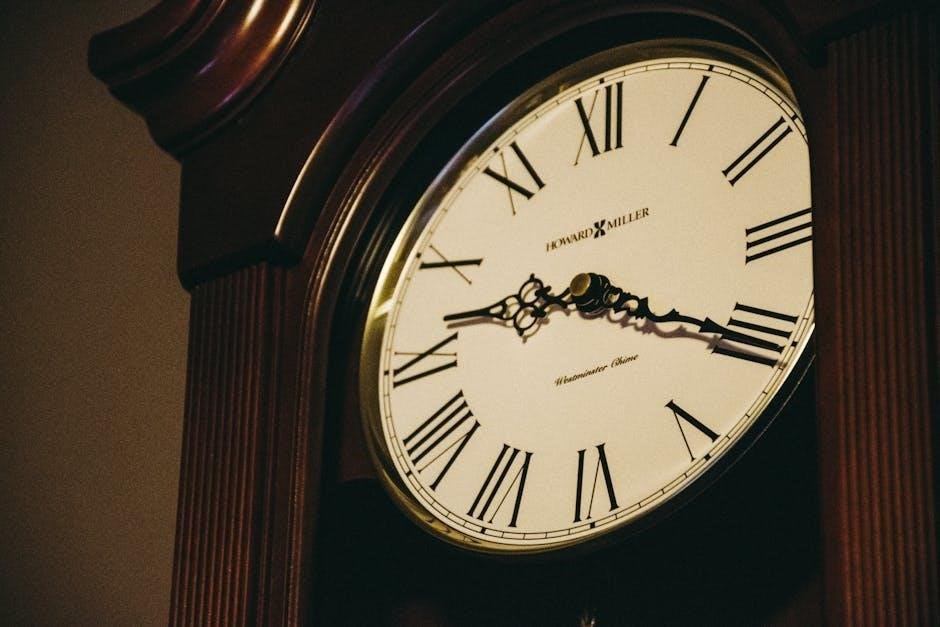
Setting the Time and Starting the Clock
Set the time by moving the hour and minute hands carefully. Start the clock by gently swinging the pendulum or winding as needed. Refer to the manual for specific guidance on activating the chimes and ensuring smooth operation.
2.1. Initial Setup and Time Adjustment
Begin by carefully unpacking and inspecting the clock. Place it on a stable, level surface to ensure proper operation. Set the time by gently moving the hour and minute hands clockwise to the correct position. Adjust the time using the control knob or key provided, following the manual’s specific instructions to synchronize accurately.
2.2. Activating the Chimes
To activate the chimes, first ensure the clock is properly set up and stable. Locate the chime control, typically found near the movement. Gently remove any packaging materials or rods securing the chimes. Set the time accurately, as chimes synchronize with the clock’s movement. Test the chimes by moving the time forward to the next hour mark. Ensure the clock is level to prevent chime malfunctions.

Maintenance and Care Tips
Regularly wax and polish the cabinet with non-silicone products. Clean glass with a non-ammonia cleaner. Wind the clock every seven days for optimal performance and longevity.
3.1. Daily and Weekly Maintenance
For daily care, gently dust the clock cabinet and glass surfaces using a soft cloth to prevent scratches. Weekly, inspect the mechanical components and ensure they are free from dust buildup. Apply non-silicone wax to the cabinet as needed to maintain its finish. Avoid using harsh chemicals or abrasive cleaners, which can damage the materials. Regular maintenance ensures the clock remains functional and visually appealing.
3.2. Cleaning the Clock Cabinet and Glass
Clean the clock cabinet with a non-silicone liquid or paste wax, applying it with a soft cloth to maintain the finish. For glass surfaces, use a non-ammonia glass cleaner, avoiding direct sprays on the clock. Never use abrasive materials or harsh chemicals, as they can damage the wood or glass. Regular cleaning preserves the clock’s appearance and ensures longevity.
Locating the Model and Serial Number
Find the model and serial number on the back of the clock or on a foil label inside the front door for identification purposes.
4.1. Checking the Back of the Clock
To locate the model and serial number, inspect the back of the clock. Howard Miller typically places a label there with this information. Gently remove any packaging materials to ensure clear visibility. This label is essential for contacting dealers or Howard Miller for support, ensuring you have the correct details for your specific clock model.
4.2. Finding the Foil Label Inside the Front Door
Additionally, the model and serial number can be found on a foil label inside the front door of your Howard Miller clock. Open the door gently to avoid damage. The label is usually placed in a visible location, ensuring easy access for reference or service needs. This provides a secondary verification method alongside the back label for accuracy.
Winding the Clock
Wind your Howard Miller clock every seven days to maintain accurate timekeeping. Follow the manufacturer’s instructions carefully to ensure proper winding and avoid damage to the mechanism.
5.1. Step-by-Step Winding Instructions
Locate the winding key provided with your Howard Miller clock.
Insert the key into the keyhole on the dial.
Turn the key clockwise until resistance is felt.
Repeat for all weight-driven clocks.
Ensure weights are lifted evenly.
Avoid overwinding to prevent damage.
Wind every seven days for optimal performance.
You may hear a slight click as the mechanism engages.
Check the pendulum’s swing after winding.
5.2. Recommended Winding Schedule
Wind your Howard Miller clock every seven days to maintain accurate timekeeping. Consistency ensures optimal performance and prevents mechanical stress. For weight-driven clocks, lift weights evenly each week. Quartz models with batteries typically require less maintenance. Always refer to the specific manual for your clock model to confirm the recommended schedule and avoid overwinding.
Understanding the Pendulum and Weights
The pendulum regulates timekeeping, while weights power the clock’s movement. Both components are essential for precise mechanical operation and must be handled carefully to maintain accuracy.
6.1. Importance of the Pendulum in Timekeeping
The pendulum plays a crucial role in maintaining accurate timekeeping. It regulates the clock’s rhythm, ensuring consistent time intervals. The pendulum’s steady swing allows the movement to divide time precisely, making it essential for mechanical clocks’ reliability and performance. Proper adjustment and stability of the pendulum are vital for optimal functionality.
6.2. Adjusting the Pendulum for Accuracy
Accurate timekeeping requires proper pendulum adjustment. Gently move the pendulum bob up or down to regulate speed. Raising it speeds up the clock, while lowering it slows it down. Small adjustments can significantly impact timekeeping accuracy over time. Handle with care to avoid damage and ensure precise regulation for optimal performance.

Troubleshooting Common Issues
Common issues include time inaccuracy or chimes not sounding; Check pendulum alignment, weight positions, and chime settings. Ensure proper assembly and consult the manual for solutions.
7.1. Clock Not Keeping Accurate Time
If your Howard Miller clock isn’t keeping accurate time, check the pendulum alignment and weight positions. Ensure the clock is level and stable. Remove any packaging materials that may interfere with movement. Clean internal components gently to avoid dust buildup. Regular maintenance, such as winding every seven days, can also improve accuracy. Refer to the manual for specific adjustments.
7.2. Chimes Not Sounding Correctly
If the chimes aren’t sounding correctly, ensure all packaging materials are removed. Check that the chime rods are free from obstructions. Verify the chime selector is set to the desired chime. Clean the chime hammers and rods with a soft cloth. If issues persist, refer to the manual or contact Howard Miller support for assistance.
Quartz vs. Mechanical Clocks
Quartz clocks use a battery-powered quartz crystal for accuracy, while mechanical clocks rely on a spring or weights. Quartz requires less maintenance, while mechanical clocks need regular winding.
8.1. Differences in Maintenance Requirements
Quartz clocks require minimal maintenance, needing only battery replacements every 1-2 years and occasional cleaning. Mechanical clocks demand more upkeep, including weekly winding and regular oil changes every 2-3 years to ensure smooth operation. Quartz clocks are more reliable for accuracy, while mechanical clocks offer a traditional appeal but need diligent care to maintain precision and functionality over time.
8.2. Choosing the Right Clock for Your Needs
Consider your lifestyle and preferences when selecting a clock. Quartz clocks are ideal for those seeking low maintenance and high accuracy, perfect for busy individuals. Mechanical clocks suit enthusiasts who appreciate traditional craftsmanship and are willing to commit to regular upkeep. Assess your needs for accuracy, maintenance tolerance, and aesthetic appeal to make the best choice for your home or office environment.

Radio-Controlled Clocks
Radio-controlled clocks feature an internal receiver tuned to a special time signal, ensuring automatic synchronization for precise timekeeping without manual adjustments. This technology enhances accuracy and reliability.
9.1. How Radio-Controlled Clocks Work
Radio-controlled clocks contain an internal receiver that picks up a special time signal broadcast from a central source. This signal synchronizes the clock’s time automatically, ensuring precision. The clock adjusts itself based on the received data, eliminating the need for manual time setting. This technology provides accurate timekeeping by linking to official time standards, reducing errors and maintenance needs.
9.2. Syncing with Time Signals
Syncing your radio-controlled clock involves receiving a time signal from a central transmitter. The clock automatically detects and decodes the signal to set the correct time. This synchronization occurs daily, ensuring accuracy. Some models may require manual activation if the signal is weak. Once connected, the clock maintains precise time without further adjustment, relying on the strength and clarity of the received signal for updates.
Downloading the Instruction Manual
Visit the official Howard Miller website to download product manuals. Search by model name or document type. Preview PDF files before downloading for convenience.
10.1. Finding Manuals Online
To find Howard Miller clock manuals, visit their official website. Navigate to the support or downloads section. Search by model name or document type. Use the model number found on the back label or inside the front door for accurate results. Preview PDF files before downloading to ensure you have the correct manual for your specific clock model.
10.2. Navigating the PDF Document
Open the downloaded PDF and use the bookmarks or table of contents for easy navigation. Bookmarks and search functions help locate specific sections quickly. Zoom in or out to adjust text size for readability. Ensure the document is viewed in a format that displays all pages correctly. Save the manual for future reference if needed.
Frequently Asked Questions
Common questions include setup issues, time accuracy, chime functionality, and maintenance tips. These are addressed in the manual to ensure proper operation and care of your clock.
11.1. Common Questions About Setup
Users often inquire about winding, time adjustment, and chime activation. The manual provides step-by-step guidance for these processes, ensuring a smooth setup experience. Additional questions address leveling the clock to maintain accuracy and proper placement for optimal performance. These solutions help first-time users confidently configure their timepiece without complications.
11.2. Tips for Long-Term Clock Care
Regularly wax and polish the cabinet using non-silicone products to maintain its finish. Clean glass with a non-ammonia cleaner to avoid damage. Ensure the clock is stable and leveled to preserve accuracy. Avoid direct sunlight and extreme humidity. These practices extend the life and beauty of your Howard Miller clock, ensuring it remains a cherished timepiece for years.
Leave a Reply